If you only want the short answer, this is the two-week Japan itinerary by train I’d give a first-time visitor:
Tokyo (東京), five nights including a day trip to Hakone (箱根) or Lake Kawaguchiko (河口湖) → Kyoto (京都), four nights including Nara (奈良) → Osaka (大阪), two nights → Hiroshima (広島), two nights including Miyajima (宮島). If you’d rather stay overnight in the Fuji area, make that four Tokyo nights plus one night in Hakone or Kawaguchiko.
It gives you modern Japan, old Japan, temples, food, mountains, a little breathing room and a route that makes geographical sense. If you’re flying home from Tokyo, add a final night there or remove one stop. If you can fly into Tokyo and out of Osaka, even better: you avoid travelling back purely to catch a plane.
But that’s the easy answer. The more truthful answer is that there’s no single perfect two-week route through Japan.
Gary and I have travelled to Japan three times. Our first trip in September 2015 was an enthusiastic first-timer sprint through Tokyo, Takayama (高山), Shirakawago (白川郷), Hiroshima, Miyajima, Kyoto and Nara, with day trips to Hakone and Kamakura (鎌倉). We returned in September 2017, stayed in Tokyo, Kanazawa (金沢) and Osaka, visited Nikko (日光), Matsumoto (松本), Jigokudani Monkey Park (地獄谷野猿公苑) and Himeji (姫路), and went to Lake Kawaguchiko – where Gary proposed – alongside places such as Shibamata (柴又) that we’d missed the first time. We also stopped at Kinkaku-ji (金閣寺) in Kyoto on the way back to Tokyo. Then, on our honeymoon in May 2019, we flew from Singapore to Okinawa (沖縄), explored Naha (那覇) and the main island, island-hopped from Ishigaki Island (石垣島) and finished in Tokyo.
In fact, each trip suited a different kind of holiday. Our first was a fast mainland circuit, our second revisited Tokyo and added central Japan and Osaka, and our honeymoon paired Tokyo with Okinawa. Treating those very different trips as one universal route would hide the choices that made each one work.
Think of this guide as a box of LEGO. Start with the essential city blocks, add one regional block that suits you, then choose your day trips. I’ve also included five finished routes if you’d rather copy one without constructing anything at all (including an honestly labelled FOMO route for travellers who knowingly prefer breadth to breathing room).
And most places in the core modules come from trips we actually made. Where a suggestion is based on research, an old wish list or a route we recommend rather than one we personally completed, I say so.
THE QUICK 14-DAY FIRST-TIMER PLAN
| Day | Sleep | Plan |
|---|---|---|
| 1 | Tokyo | Arrive and keep the evening local |
| 2 | Tokyo | Imperial Palace (皇居), Marunouchi (丸の内), Ginza (銀座) and Yurakucho (有楽町) |
| 3 | Tokyo | Shibuya (渋谷), Meiji Shrine (明治神宮) and Shinjuku (新宿) |
| 4 | Tokyo | Ueno (上野), Asakusa (浅草) and east Tokyo |
| 5 | Tokyo | Choose Hakone, Kawaguchiko or Kamakura |
| 6 | Kyoto | Travel to Kyoto; Gion (祇園) or the Kamo River (鴨川) in the evening |
| 7 | Kyoto | Higashiyama (東山) and Kiyomizu-dera (清水寺) |
| 8 | Kyoto | Fushimi Inari Taisha (伏見稲荷大社) plus a compact southern or central Kyoto route |
| 9 | Kyoto | Arashiyama (嵐山) or Nara |
| 10 | Osaka | Travel to Osaka; food-focused evening |
| 11 | Osaka | Osaka city |
| 12 | Hiroshima | Stop at Himeji while travelling west |
| 13 | Hiroshima | Hiroshima Peace Memorial Park (広島平和記念公園) and museum |
| 14 | Hiroshima | Miyajima; travel towards your departure airport only if the timing is sensible |
Short on time? If these are fourteen calendar days including long-haul flights, remove one Tokyo day and either Osaka or Hiroshima. Don’t quietly pretend arrival and departure consume no time.
Jump to the part you need
Use these links to go straight to the part that matches the trip you’re planning:
Our answer in 30 seconds
| If you’re… | Build your trip around… | The block I’d leave out |
|---|---|---|
| Visiting Japan for the first time | Tokyo + Kyoto + Osaka/Nara + one of Hakone or Kawaguchiko | Okinawa and the full Alps loop |
| More interested in old towns and mountain scenery | Tokyo + Kanazawa + Takayama/Shirakawago + Kyoto | Hiroshima, unless its history is important to you |
| Returning to Japan | Tokyo day trips + Kanazawa + Osaka/Himeji | Repeating every Golden Route sight |
| Planning a honeymoon | Tokyo + Okinawa Main Island (沖縄本島) + Ishigaki/Taketomi/Iriomote | The classic cross-country rail sprint |
| Determined to minimise hotel changes | Tokyo + Kyoto + Osaka, with day trips | Takayama and Hiroshima on the same trip |
My strongest advice: choose no more than four overnight bases in two weeks (three is even kinder on your luggage). Japan’s trains are excellent, but checking out, finding platforms, moving luggage and checking in again still consumes energy. In fact, a route can be technically possible and still be a terrible holiday.
How this guide is different
Most Japan itinerary posts give you one answer. This one gives you:
- the exact shape of our three real trips;
- mix-and-match modules with minimum time, route logic and honest drawbacks;
- finished combinations for different types of traveller, including one deliberately faster 16-day route;
- the mistakes we made, including arriving at attractions just before closing, underestimating distances and treating a national holiday as though it would politely ignore us;
- clear separation between our lived experience and details that must be rechecked now.
But I’ve not added ten extra destinations simply because competitors mention them. A long list isn’t the same thing as a useful itinerary.
The three real trips behind this itinerary
Trip one: our first two weeks in Japan, September 2015
Route: Tokyo → Takayama and Shirakawago → Hiroshima and Miyajima → Kyoto and Nara → Tokyo
We stayed at Grand Arc Hanzomon in Tokyo, Hida Takayama Washington Hotel Plaza, Chisun Hotel Hiroshima and Urban Hotel Kyoto. We returned to Grand Arc Hanzomon for our final Tokyo night.
Our 2015 spending notes recorded £700 per person under “Flights + Hotel”. We’d booked our Tokyo accommodation together with the flights as an Expedia deal, but the surviving source doesn’t divide that £700 between the flights and hotel or prove that every hotel on the route formed part of the package. Across the trip, our hotels averaged 3,750 yen per person per night (about £20 at the time). These are dated figures from September 2015, not present-day estimates – prices have obviously changed since then.
Tokyo was our base for city days and trips to Hakone and Kamakura. We then activated a seven-day Japan Rail Pass for the long-distance section of the trip.
This trip also produced lost luggage, the hardest hotel bed I’d ever slept on, a bidet-control incident, a sprint to Kamakura’s Great Buddha with five minutes to spare and a very dark arrival back in Hakone that briefly made us wonder whether all transport had stopped.
It wasn’t polished travel. It was, however, very real.
Trip two: Tokyo, central Japan and Osaka, September 2017
Route: Tokyo, including Nikko, Kawaguchiko and Shibamata → Matsumoto → Kanazawa, including Jigokudani → Osaka, including Himeji → Kinkaku-ji in Kyoto → Tokyo
Our booking records show four nights at Shiba Park Hotel, followed by single nights at The Ritz-Carlton Tokyo and The Gate Hotel Kaminarimon. We then stayed three nights at Hotel Mystays Premier Kanazawa, three nights at Hotel Cordia Osaka and one night at ONE@Tokyo.
The trip diary fills in the days between those hotel stays. On 18 September we visited Nikko, including Shinkyo Bridge (神橋), Nikko Toshogu Shrine (日光東照宮) and Nikko Futarasan Shrine (日光二荒山神社). On 19 September we went to Lake Kawaguchiko, where our day included the ropeway, a boat trip, soba, a paddle boat and a lakeside walk – and where Gary proposed! (I’m never going to be completely objective about Kawaguchiko after that.) On 20 September we explored Shibamata, including the Katsushika Shibamata Tora-san Museum (葛飾柴又寅さん記念館), temple, old street and a teahouse. On 21 September we combined Roppongi Hills (六本木ヒルズ) with Odaiba (お台場), including the science museum and ASIMO.
On 22 September we visited Matsumoto Castle (松本城) while travelling to Kanazawa. During our Kanazawa stay we visited the castle, Kenroku-en (兼六園), a tea ceremony, Nomura Samurai House (武家屋敷跡 野村家) and Nagamachi (長町), Higashi Chaya district (ひがし茶屋街) and, memorably, ate gold-leaf ice cream. On 24 September we travelled from Kanazawa to Jigokudani Monkey Park, where there wasn’t any snow but there were baby monkeys (and a train with wonderfully large glazed windows).
Those four mainland stops make more sense when you see what each castle actually is. Our Japanese castle comparison sets Matsumoto, Kanazawa, Osaka and Himeji beside the two Ryukyuan sites we visited in Okinawa.
From 25–27 September Osaka included Grand Front Osaka (グランフロント大阪), Osaka Aquarium Kaiyukan, Osaka Castle (大阪城), Shinsaibashi (心斎橋), Dotonbori (道頓堀), Kuromon Market (黒門市場) and Den Den Town (でんでんタウン). On 27 September we also visited Himeji Castle (姫路城), Koko-en (好古園) and a Hello Kitty café. The following day, 28 September, we stopped at Kinkaku-ji in Kyoto on our way back to Tokyo before flying home.
Our 2017 Odaiba day can’t be copied exactly now. The ASIMO demonstrations we saw at Miraikan ended in March 2022, and Palette Town and its Giant Sky Wheel also closed in 2022 for redevelopment. Treat the diary as a record of our day, then build a new Odaiba plan around attractions that are operating for your dates. Miraikan has also announced that the entire museum will close for refurbishment from 1 October 2026 to 22 April 2027, so check the official closure notice before including it.
Trip three: our Singapore and Japan honeymoon, May 2019
Japan route: Naha → Ishigaki, with Taketomi and Iriomote → Tokyo
After four nights at YOTEL Singapore Orchard Road, we flew to Naha and stayed four nights at The Naha Terrace. We then spent three nights at Grandvrio Resort Ishigakijima before finishing with four nights at Hotel The Celestine Tokyo Shiba.
The surviving 2019 booking emails give us exact totals for two of those Japanese hotels. Our three-night Grandvrio booking cost 61,236 yen in total for the two of us, including breakfast and 4,536 yen in 8% VAT. Our four-night Celestine booking was 75,530 yen in total for the two of us, including the stated 8% VAT and 10% service charge but excluding the local accommodation tax. These are whole-booking totals from May 2019, not per-person figures or current prices. I haven’t added a Naha hotel price because the confirmed amount hasn’t been recovered, and I haven’t counted a different Naha booking that we cancelled for free (a cancelled reservation isn’t travel expenditure, however temptingly complete it makes the spreadsheet look).
In Okinawa we explored Naha without a car, took the ferry to Zamami Island, hired a car for a very full road trip around the main island, flew to Ishigaki, visited Taketomi Island by ferry, ox cart and bicycle, and joined a kayaking and trekking trip to Pinaisara Falls (ピナイサーラの滝) on Iriomote Island.
And that route belongs in this guide because Okinawa is a genuine alternative to the classic mainland itinerary – not an extra block to bolt onto Tokyo, Kyoto, Osaka, Hiroshima and the Japanese Alps in the same fortnight.
Before you start building: five rules that make the route work
1. Decide what your fourteen days actually include
Some itineraries count the long-haul flight as Day 1. Others begin when you wake up in Japan. So check where the counting begins before deciding one 14-day route is more realistic than another.
In ready-made Routes 1–4 below, Day 1 is your arrival day and Day 14 is your final full day or departure day, depending on your flight. The FOMO route is explicitly sixteen days. If you land late or leave early, remove an activity rather than pretending airport time doesn’t exist (it does, unfortunately).
2. Choose two anchors and one adventure block
For a first trip, Tokyo and Kyoto are the obvious anchors. Your adventure block can then be:
- Hakone or Lake Kawaguchiko for Mount Fuji (富士山) and landscape;
- Kanazawa, Takayama and Shirakawago for historic towns and the Alps;
- Hiroshima and Miyajima for modern history and an island day;
- Okinawa for beaches, Ryukyu culture and subtropical nature.
You can fit two smaller blocks if you travel quickly. But trying to include all four is where a holiday turns into an endurance event (you’re allowed to leave something for next time).
3. Group Tokyo by neighbourhood
On our first day, we walked from the Imperial Palace area through Marunouchi and Ginza to dinner beneath the railway arches at Yurakucho. That worked because the stops belonged together.
Honestly, Tokyo punishes random pin-dropping (a lesson we learned quickly). If your morning sight is in Asakusa and lunch is in Shibuya, you can spend an impressive amount of your holiday underground. Build your days around neighbouring districts.
4. Price the route before buying a rail pass
Our seven-day Japan Rail Pass made sense for the expensive long-distance week of our 2015 trip. That doesn’t mean a nationwide pass automatically saves money now. Compare the current pass price with the individual rail legs in your route, then buy what suits the maths rather than the mythology.
Our 2015 spending notes record £150 per person for that seven-day pass. That’s evidence of what we paid then, not a current price – rail-pass prices have obviously changed since 2015.
One important change is already clear: the JR Group substantially increased nationwide Japan Rail Pass prices in October 2023. That change also added an option pass holders didn’t previously have: you can now use Nozomi and Mizuho services by buying the relevant pass-holder-only special ticket for each trip. Before October 2023, the nationwide pass couldn’t be used on those services at all. Check the current coverage and conditions against your exact route rather than relying on an older blog calculation (including ours).
KAT’S TIP – WANT THE FULL COST BREAKDOWN?
The 2015 prices in this itinerary are included as evidence of what we actually paid, not as a current budget. If you’re working out how much two weeks in Japan costs now, see our Japan travel budget guide for the full breakdown.
5. Treat day trips as interchangeable, not collectible
Our Tokyo day-trips comparison puts six trips we actually took side by side, including journey time, cost, planning effort and the drawbacks that glossy lists tend to misplace.
Hakone, Kawaguchiko, Nikko and Kamakura aren’t four compulsory Tokyo achievements (tempting though that list may be). They offer different things. Choose one or two.
And the same applies to Nara, Himeji and Hiroshima from Kansai. Every day trip adds a return leg and removes time from the city where you’re sleeping.
MAKING SENSE OF THE JAPAN MAP
Japan is an archipelago, but most classic first-time itineraries concentrate on the island of Honshu (本州). Tokyo sits in Kanto; Kyoto, Osaka and Nara form the practical Kansai cluster; Kanazawa, Takayama and Shirakawago create a central mountain detour; Hiroshima and Miyajima extend the route west. Okinawa is a separate flight-based island trip, not the next station after Kyoto. If you have a week for Kansai alone, use our seven-day Kyoto, Nara, Osaka and Himeji itinerary instead of trying to squeeze that region into a national loop.
That geography matters more than the number of attractions on your wish list. If you remember one thing while building your route, make it this: group places into clusters, then connect those clusters with as few hotel changes as possible.
| Route cluster | Natural base or bases | Best additions | Main trade-off |
|---|---|---|---|
| Tokyo and Kanto | Tokyo | Hakone, Kawaguchiko, Kamakura or Nikko | Day trips can consume several of your Tokyo days |
| Japanese Alps | Kanazawa and/or Takayama | Shirakawago; a Matsumoto stop only if the route genuinely supports it | Rural buses and luggage need more planning than the main rail corridor |
| Kansai | Kyoto and/or Osaka | Nara and Himeji | Staying in both cities adds a hotel change; staying in one adds evening travel |
| Western Honshu | Hiroshima | Miyajima | Adds distance and usually replaces the Alps in a comfortable two-week trip |
| Okinawa | Naha and Ishigaki | Zamami, Taketomi and Iriomote | Requires domestic flights and replaces a mainland region |
Let the season and logistics change the combination
And your route won’t work equally well at every time of year. Cherry-blossom and autumn-colour periods increase pressure on accommodation and famous sights. Mountain weather can affect views and hiking. Typhoons or rough seas can disrupt island plans. National holidays can transform a rural bus ride, as we discovered in traffic on the way to Shirakawago.
Don’t hard-code current bloom forecasts, ferry times or pass prices into a long-lived itinerary. Explain the decision, then link readers to the official source that should be checked for their dates.
So this is where your route should branch:
- First visit: combine Tokyo/Kanto with Kansai and either Hiroshima or the Alps.
- Repeat visit: reduce the Golden Route and use Kanazawa, a different Tokyo day-trip block or Himeji.
- Honeymoon or island trip: combine Tokyo with Okinawa and remove Kyoto, Hiroshima and the Alps rather than racing through all of them.
- Fourteen calendar days including flights: use three bases, or four at most.
- Fourteen full sightseeing days: the longer first-timer and Alps combinations become more realistic.
PART I – TOKYO AND KANTO
BUILDING BLOCK 1: TOKYO
- Allow
- at least three full days; four or five is better
- Best for
- every first trip; food, neighbourhoods, modern culture and easy day trips
- Connects well to
- everywhere
- Our experience
- all three trips
Tokyo isn’t a single attraction with a few things around it. It’s a collection of neighbourhoods large enough to swallow an entire holiday. Give yourself time, then divide it geographically. If Tokyo is your main priority, our five-day Tokyo itinerary goes into the city days in more detail.
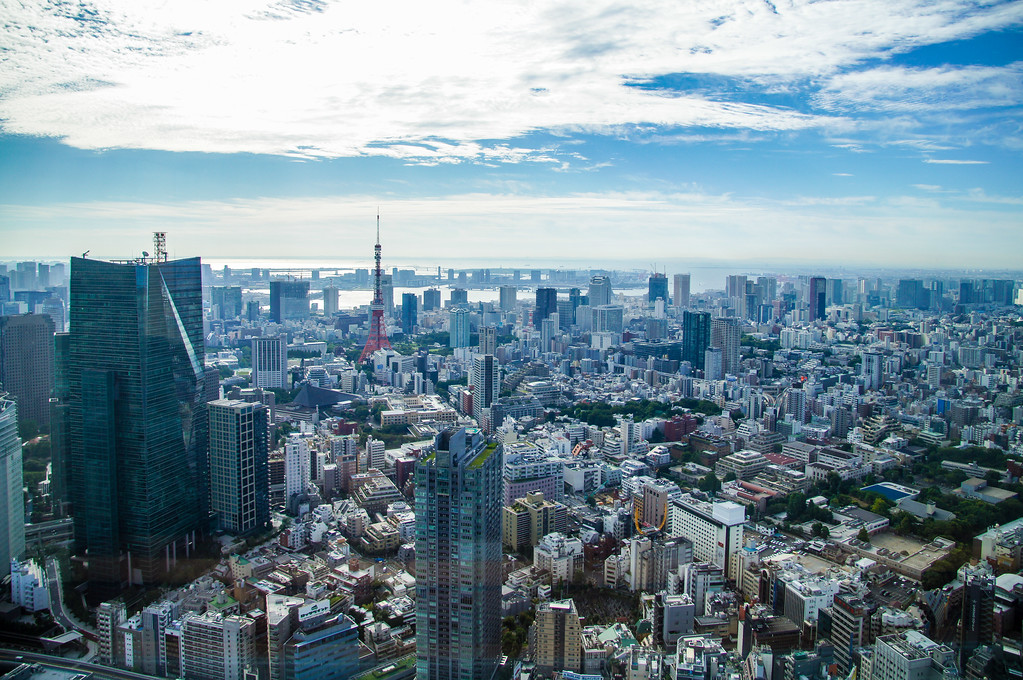
A FOUR-DAY TOKYO BLOCK THAT DOES NOT ZIGZAG
Day 1 – Central Tokyo: Imperial Palace East Gardens (皇居東御苑) → Marunouchi → Ginza → Yurakucho
Day 2 – West Tokyo: Shibuya → Harajuku (原宿) → Meiji Shrine → Shinjuku
Day 3 – East Tokyo: Ueno → Asakusa → water bus to Odaiba
Day 4 – Choose your interest: Tokyo Skytree (東京スカイツリー), Sumida (墨田区) and Ryogoku (両国) or Tsukiji (築地) Outer Market and Akihabara (秋葉原)
Keep a fifth day for one Kanto day trip if your flight schedule allows it.
KAT’S TIP – SAVE THE STATION EXIT, NOT JUST THE STATION
A map pin for “Shinjuku Station” isn’t enough. Trust me: save the precise exit or a nearby landmark for your first stop, especially at the largest stations. The wrong exit can turn a simple arrival into a confusing detour before the day has properly begun.
Tokyo day A: Imperial Palace, Marunouchi, Ginza and Yurakucho
This was our first sightseeing route in Japan after arriving without our luggage and with very little sleep.
Start at the Imperial Palace East Gardens, then walk through the polished towers of Marunouchi and continue into Ginza. End beneath the tracks at Yurakucho, where the atmosphere becomes noticeably more relaxed and the restaurants occupy the brick railway arches.
Our first Japanese dinner there was thick udon for me and katsu with rice for Gary. I called the curry sauce “gorgeous” on camera; the restaurant’s name is still one of the details I need to fill in.
Why the block works: the districts sit naturally beside one another and the day can be shortened if jet lag wins.
Honest note: don’t plan a rare inner-palace tour on arrival day. The public gardens are a much more forgiving first stop.
Tokyo day B: Shibuya, Harajuku, Meiji Shrine and Shinjuku
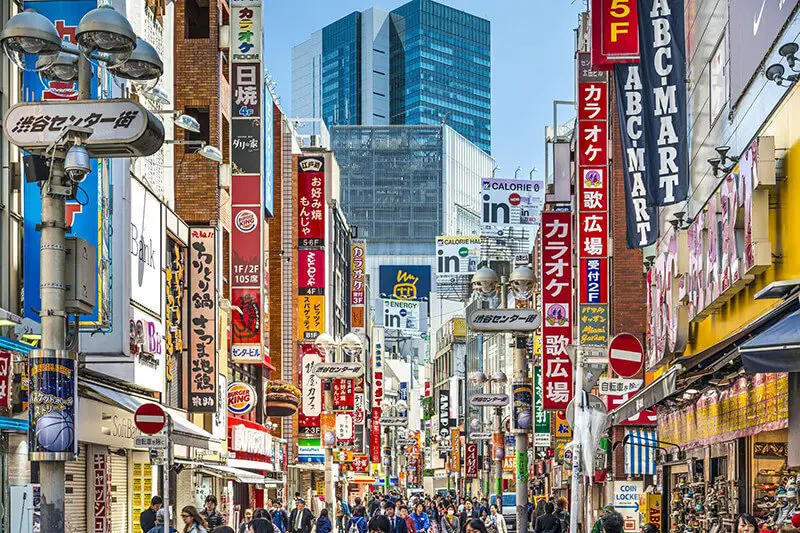
Begin around Shibuya Crossing, then travel one stop or walk towards Harajuku. Takeshita Street (竹下通り) is famous for youth fashion, crepes and visual chaos. To be honest, I didn’t love it as much as I expected to (you don’t have to love somewhere just because it’s famous). But that’s allowed. A famous place isn’t a personal obligation.
In fact, the forested approach to Meiji Shrine provided the contrast I needed. From there, finish in Shinjuku and use a high viewpoint for the city after dark.
But when we visited the Tokyo Metropolitan Government Building (東京都庁舎), cloud hid Mount Fuji completely. That’s one reason not to build an entire Tokyo day around a promised mountain view.
Why the block works: neon, fashion, forest and skyline in one side of the city.
Tokyo day C: Ueno, Asakusa and Odaiba
We began in Ueno Park and the Tokyo National Museum (東京国立博物館), where Gary discovered that the archaeology section he particularly wanted to see was closed (of course, it was the section he’d been most excited about). I found the rest of the museum extraordinary and immediately regretted allocating too little time.
Continue to Asakusa for Kaminarimon (雷門), Nakamise-dori (仲見世通り) and Senso-ji (浅草寺). This is an excellent place to try small snacks rather than committing to a long lunch. We ate sweet-potato treats, taiyaki and a deep-fried minced-meat snack as we walked.
From Asakusa we took the water bus across Tokyo Bay (東京湾) to Odaiba. The boat made the transition from traditional streets to a futuristic artificial island feel like part of the day rather than simply another transfer.
Why the block works: it tells a story – from historic collections and temple streets to Tokyo Bay and modern entertainment.
What I’d change: give the National Museum half a day if you genuinely enjoy museums. Don’t call it a quick stop and then become annoyed when time behaves normally.
Tokyo day D: Skytree, Sumida, Ryogoku and sumo
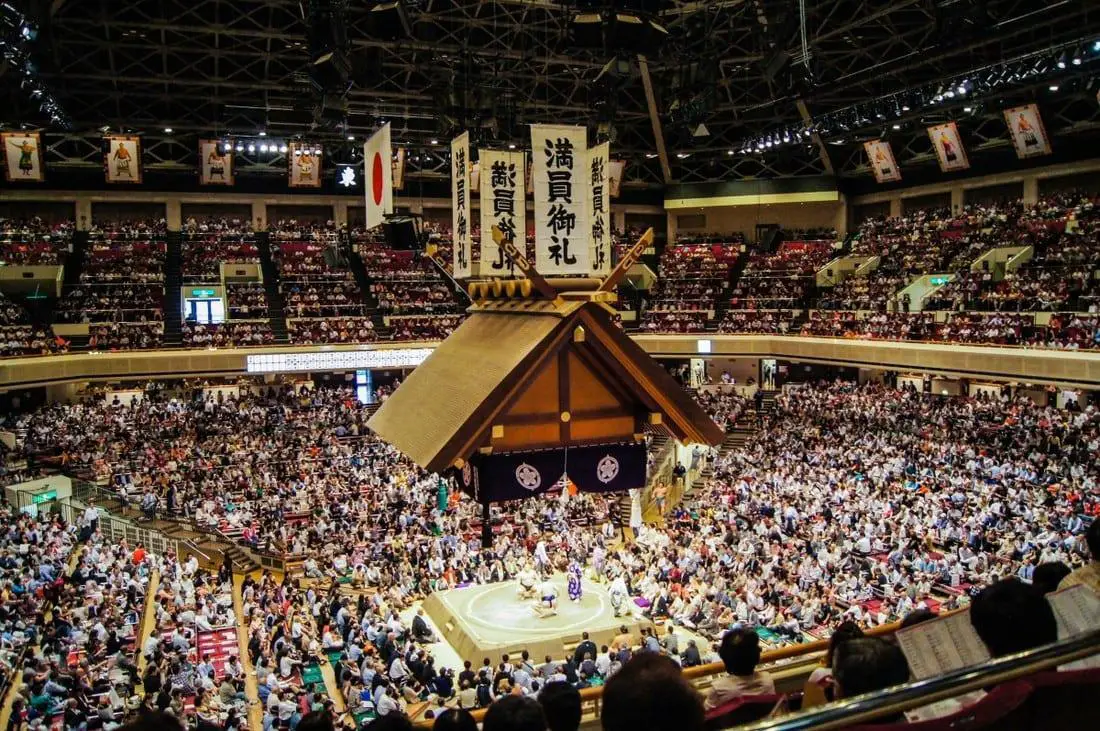
We paired Tokyo Skytree and Sumida Aquarium (すみだ水族館) with the Edo-Tokyo Museum (東京都江戸東京博物館) and an afternoon sumo tournament at Ryogoku Kokugikan (両国国技館).
If aquariums are one of your priorities, our Sumida vs Kaiyukan vs Churaumi comparison will help you decide which one belongs naturally in your route.
The aquarium’s large penguin enclosure was one of my favourite parts of the day. The view from Skytree was impressive, although the city’s scale is almost difficult to process from that height.
We reached the sumo stadium around the time the top-division bouts began. If a tournament coincides with your dates, this is worth planning well in advance. It was far more compelling than treating sumo as a brief demonstration created for tourists.
Our 2015 trip notes and Day 4 vlog both recorded admission to the Edo-Tokyo Museum’s permanent exhibition at 600 yen. I’ve deliberately left out the old sterling conversion because it conflicts with the exchange-rate examples elsewhere in the same 2015 records. The 600-yen amount is evidence of the 2015 admission price, not a current one.
WHAT HAS CHANGED SINCE OUR VISIT? The Edo-Tokyo Museum reopened on 31 March 2026 after a four-year closure for major renovation, so it’s open to visitors again. Check the official museum site for current visiting details and admission before building a day around it. For sumo, use the Japan Sumo Association’s official tournament schedule and ticket information rather than the third-party seller mentioned in our 2015 vlog. Dates, venues and sale windows vary by tournament.
Tokyo day E: Tsukiji and Akihabara
Our day began with a seafood rice bowl at Tsukiji and ended amid the capsule machines, retro games and maid cafés of Akihabara.
Tsukiji’s wholesale market and tuna auction moved to Toyosu Market (豊洲市場) in 2018, so our 2015 experience shouldn’t be presented as a current auction guide. The Tsukiji Outer Market remains a separate food and shopping area. If the wholesale market or tuna-auction viewing is your priority, plan Toyosu as a different visit and check its official visitor rules first.
In Akihabara, we went looking for Super Potato, became distracted by rows of gachapon machines and eventually tried a maid café. The food was extremely cute (almost too cute to eat, although we managed). The experience was also sufficiently surreal that it didn’t require embellishment.
Why the block works: it combines two very different types of Tokyo intensity. For more meal ideas across the city, see our first-hand guide to what to eat in Tokyo.
Which Tokyo hotel area worked for us?
We’ve stayed around Hanzomon (半蔵門), Shiba (芝)/Minato (港区), Asakusa, Oshiage (押上) and Tokyo Shiba, and we also spent one hosted night at The Ritz-Carlton Tokyo.
There’s no universally best Tokyo neighbourhood. Choose according to the days you’ve built:
- Hanzomon: useful for the Imperial Palace side of the city and quieter evenings.
- Asakusa: good for Senso-ji, old Tokyo atmosphere and access to the east.
- Oshiage: ideal if Skytree and Sumida are priorities, but less central for western districts.
- Shiba/Minato: a calmer base with useful transport connections.
- Roppongi (六本木): convenient for museums, nightlife and a luxury stay, but priced accordingly.
Link each named hotel only to a first-hand review. Don’t turn this section into an untested “best hotels in Tokyo” list.
BUILDING BLOCK 2: CHOOSE A TOKYO DAY TRIP
- Allow
- one day each; stay overnight only when the place itself matters more than ticking the highlights
- Best for
- adding nature, historic towns or Fuji views without changing the whole route
Choose: one for a relaxed first trip, two for a faster one
Hakone: choose it for the scenic loop and onsen, not a guaranteed Fuji view
Our Hakone day included the bus to Lake Ashi (芦ノ湖), Hakone Shrine (箱根神社), the sightseeing ship, a replacement bus around a volcanic closure, the cable car, Gora Park (強羅公園) and the mountain railway.

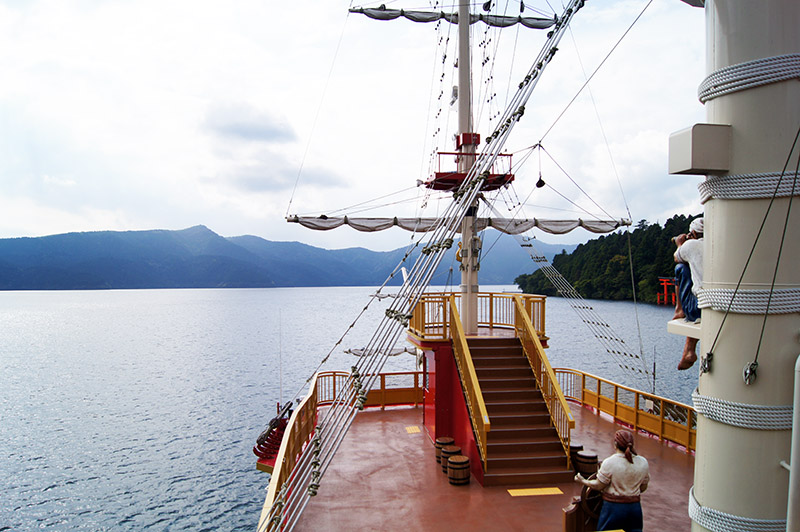
OUR HAKONE LOOP, WITHOUT FALSE PRECISION
Hakone-Yumoto (箱根湯本) → bus to Moto-Hakone (元箱根) → Lake Ashi and Hakone Shrine → lakeside walk and old Tokaido (旧東海道)/Checkpoint area → sightseeing ship → ropeway or the current replacement transport → Owakudani (大涌谷) if open → cable car to Gora (強羅) → Gora or the Open-Air Museum → mountain railway back to Hakone-Yumoto.
The order is the useful part. Exact connections, closures and final services must be checked for the reader’s date.
KAT’S TIP – START EARLIER THAN WE DID
By the time we took the mountain railway back, daylight was disappearing and the quiet streets made us briefly worry that we had missed the way home. Know the last connection and treat volcanic closures as normal planning variables, not rare surprises.
And that list is precisely why Hakone is fun: the transport becomes part of the experience. It’s also why the day takes longer than it looks.
We didn’t see Mount Fuji. The rose garden wasn’t in flower. Owakudani was closed because of volcanic activity. We still enjoyed the day.
Choose Hakone if you want an onsen, a scenic circuit and varied transport. If your only goal is the classic Fuji view, Kawaguchiko is usually the more logical block.
Read our complete Hakone day-trip itinerary.
Lake Kawaguchiko: choose it for Fuji views and a personal overnight
We visited Lake Kawaguchiko on our second trip. It became the most personal stop in the whole itinerary because Gary proposed there! (So yes, I’m slightly biased when I tell you to consider staying overnight.)
Kawaguchiko makes sense for travellers who want to build a day or overnight stay around Mount Fuji, lakeside scenery and a slower change of pace. Weather still decides whether the mountain appears. No itinerary can negotiate with clouds.
I’d stay overnight if Fuji is a major priority. It gives you more than one viewing window and stops the day feeling like a long return trip from Tokyo.
Read about our Lake Kawaguchiko day trip and proposal.
Kamakura: choose it for temples and a coastal-town day
We began at Engaku-ji (円覚寺) and later attempted to reach the Great Buddha of Kamakura (鎌倉大仏) at Kotoku-in (高徳院). Between those two points we walked in the wrong direction towards Ofuna (大船; not our finest navigational moment), realised our mistake and ended up rushing through Kamakura with five minutes to spare before the final admission to the interior – but we made it!
The Great Buddha was worth reaching. The sprint wasn’t an essential cultural experience.
Kamakura suits travellers who want a historic day without committing to a long mountain circuit. Leave Tokyo early, choose a logical temple order and check closing times before lunch – not while running towards an eleven-metre bronze statue.
Nikko: choose it for grand shrines and forest
We visited Nikko from Tokyo on 18 September 2017. Our route included Shinkyo Bridge, Toshogu Shrine and Futarasan Shrine, giving us a full day of ornate historic sites surrounded by forest.
Nikko is a substantial outing, so don’t combine it with an evening plan that matters. It suits travellers who want a concentrated heritage day rather than another Tokyo neighbourhood, and it deserves an early start rather than being squeezed around other plans.
Yokohama: choose it for an easy, food-focused city day
Yokohama is the easiest of these options to keep flexible. We used it as a rainy-day replacement when a typhoon made our planned Nikko trip look rather unwise.
Choose it for the Shin-Yokohama Ramen Museum, a waterfront wander and an urban day that does not demand a painfully early start. Read our Yokohama day-trip itinerary.
Kawagoe: choose it for merchant streets and food
Kawagoe is a straightforward day trip from Ikebukuro when you want historic streets, temples and local food without committing to a long mountain journey. We spent the day between Kita-in, the old warehouse district, Hikawa Shrine and Candy Alley – plus one very avoidable encounter with two closed attractions.
Choose it for Kurazukuri merchant houses, sweet-potato treats and an easy change of pace from central Tokyo. Read our Kawagoe day-trip itinerary.
PART II – THE JAPANESE ALPS
OPTIONAL BLOCK: NAGANO (長野) AND JIGOKUDANI MONKEY PARK
- Allow
- a full day from Kanazawa as we did; one night in Nagano makes the route easier
- Best for
- wild macaques, forest scenery and travellers already using the Nagano corridor
- Connects well to
- Tokyo, Matsumoto and Kanazawa
- Our experience
- day trip from Kanazawa on 24 September 2017

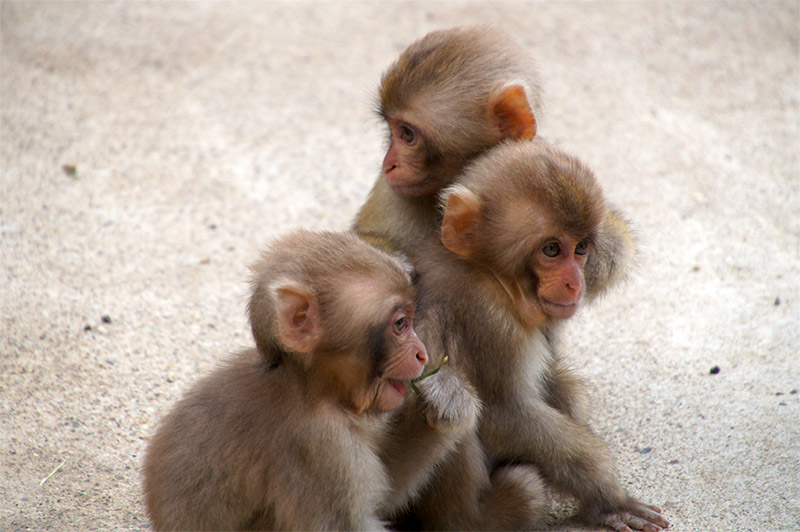
We visited Jigokudani as a day trip from Kanazawa. There wasn’t any snow in September, so this wasn’t the classic winter scene you see in photographs, but there were baby monkeys – honestly, that was more than enough compensation. The train’s large glazed windows also made the journey feel like part of the day rather than dead time.
Our route proves a Kanazawa day trip is possible, but it’s a substantial outing. If you’re travelling between Tokyo and Kanazawa, an overnight in Nagano is the gentler option: leave your luggage at the hotel or station, visit the park and continue the following morning. The exact local connections and any reserved-seat rules need a fresh official check before publication.
TWO WAYS TO BUILD THE JIGOKUDANI BLOCK
Our 2017 route: Kanazawa → Jigokudani Monkey Park → forest walk and monkey area → return to Kanazawa. Check the current transport sequence before copying it.
Gentler route: Tokyo → Nagano → leave luggage → visit Jigokudani → sleep in Nagano → continue towards Kanazawa or Matsumoto the following morning.
OPTIONAL CONNECTOR: MATSUMOTO
- Allow
- one night if you want the city; a transfer-day stop only with light luggage and a sound onward connection
- Best for
- one of Japan’s most recognisable surviving castles and an alternative link through central Honshu
- Our experience
- visited Matsumoto Castle en route to Kanazawa on 22 September 2017
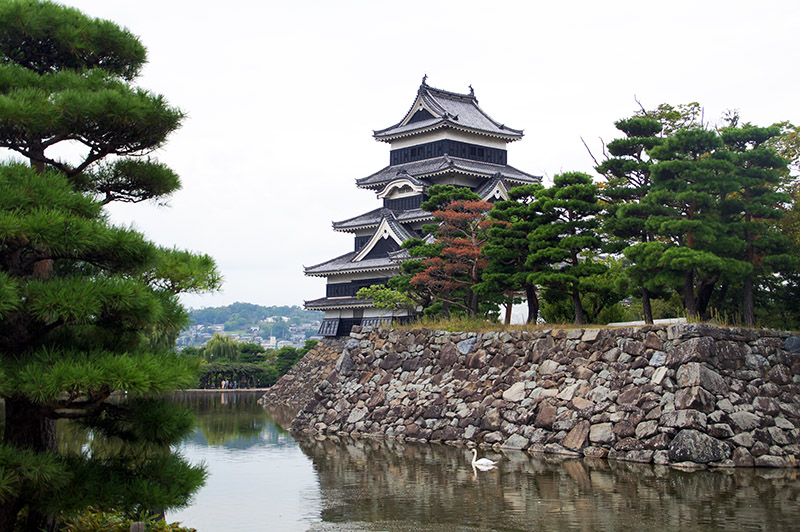
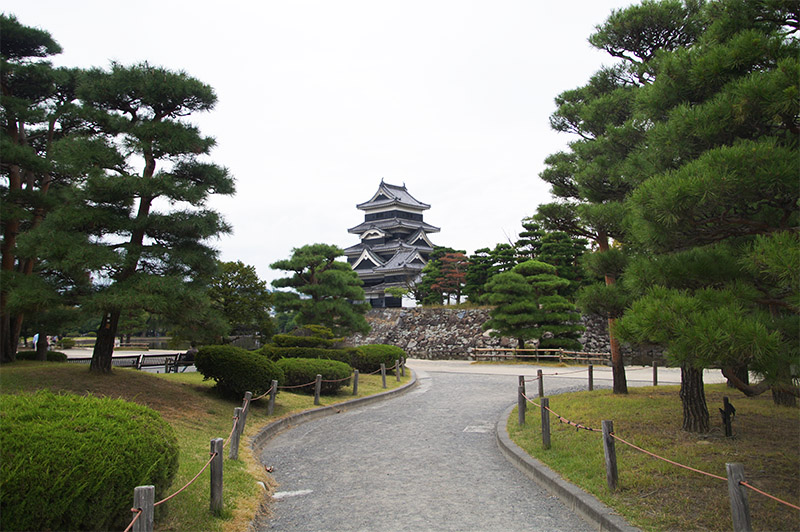
We used Matsumoto as a stop while travelling to Kanazawa, visiting the black castle, moat and grounds before continuing. It broke up the travel day with something genuinely worth seeing (rather than inventing a transfer stop simply to fill time).
If you want to do the same, travel with light luggage or use station storage and check the onward connection before you start sightseeing. The practical order is Matsumoto Station → castle and moat → optional Nawate Street (縄手通り)/Nakamachi Street (中町通り) area → lunch → collect luggage → onward train.
BUILDING BLOCK 3: TAKAYAMA AND SHIRAKAWAGO
- Allow
- two nights minimum; three is more comfortable
- Best for
- mountain scenery, historic streets, markets and a smaller-town contrast
- Connects well to
- Tokyo via Nagoya; Kanazawa; Kyoto
- Our experience
- first trip, September 2015
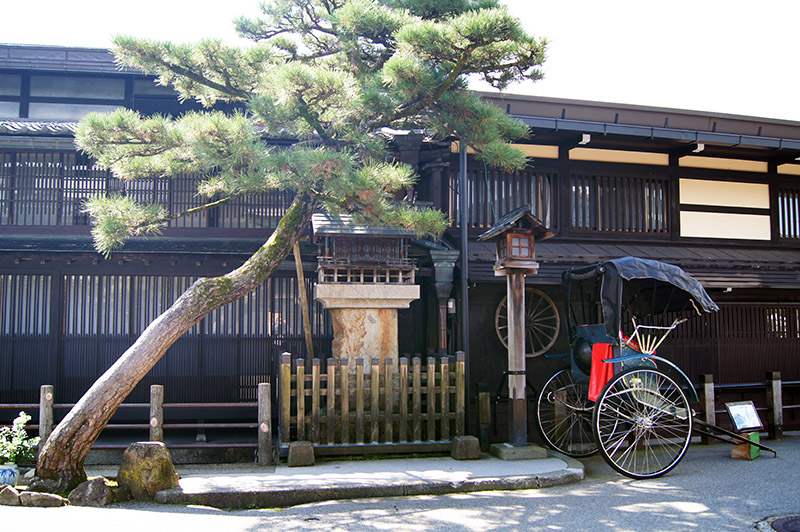
We travelled from Tokyo to Nagoya (名古屋) by Shinkansen, then changed for Takayama. The slower mountain train wasn’t dead time; it was the transition from Tokyo’s scale to the Japanese Alps.
A TWO- OR THREE-NIGHT ALPS BLOCK
Arrival day: Travel to Takayama, then use the evening for the old town and dinner.
Full Takayama day: Morning market → Sanmachi Suji → Takayama Jinya (高山陣屋) → Hida (飛騨) food → optional Higashiyama walk.
Shirakawago day: Pre-booked bus → Shiroyama viewpoint → Ogimachi (荻町) and one farmhouse → return to Takayama or continue to Kanazawa.
Add a third night if you want both towns without organising the whole block around bus times.
Day one: Takayama
Walk through the old town, visit the morning markets and make time for the historic merchant streets rather than treating Takayama only as a bed for Shirakawago.
Food is part of the reason to stop. We tried Hida beef and ate at places that included Center 4 Hamburgers and Jakuson curry. These are memories from 2015 rather than current restaurant recommendations; I couldn’t verify both businesses to the same standard from official sources, so check directly before making either one part of the route.
Our 2015 trip notes also recorded admission to the Takayama Matsuri Yatai Kaikan (高山祭屋台会館) at 820 yen (about £5 at the time). Again, that’s the documented 2015 price, not the current admission charge – prices have obviously changed since then.
Day two: Shirakawago
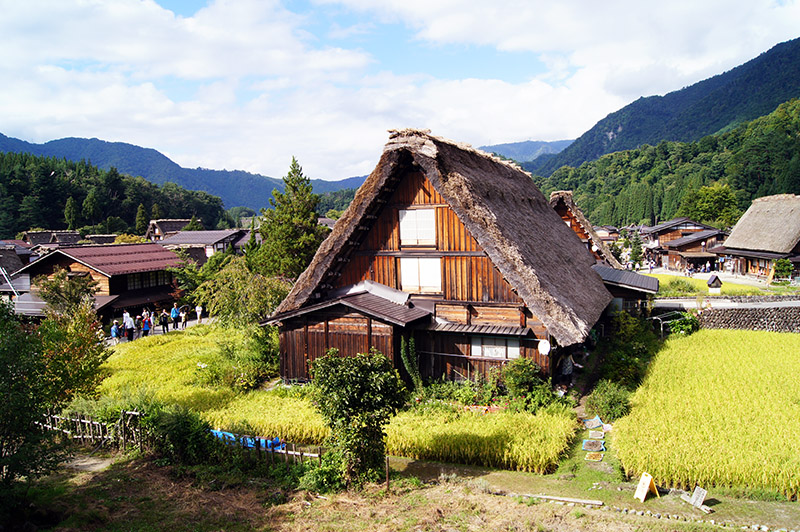
We took the bus to Shirakawago during a Japanese national holiday. The ride took roughly three hours in heavy traffic (not quite the neat little transfer we’d imagined), and we nearly missed the final bus back.
KAT’S TIP – THE LAST BUS MATTERS MORE THAN GETTING THE SHOT
We travelled on a national holiday, sat in heavy traffic and came uncomfortably close to missing the final bus. Book the bus when possible, leave early and don’t schedule a tight onward connection on the assumption that rural traffic will behave.
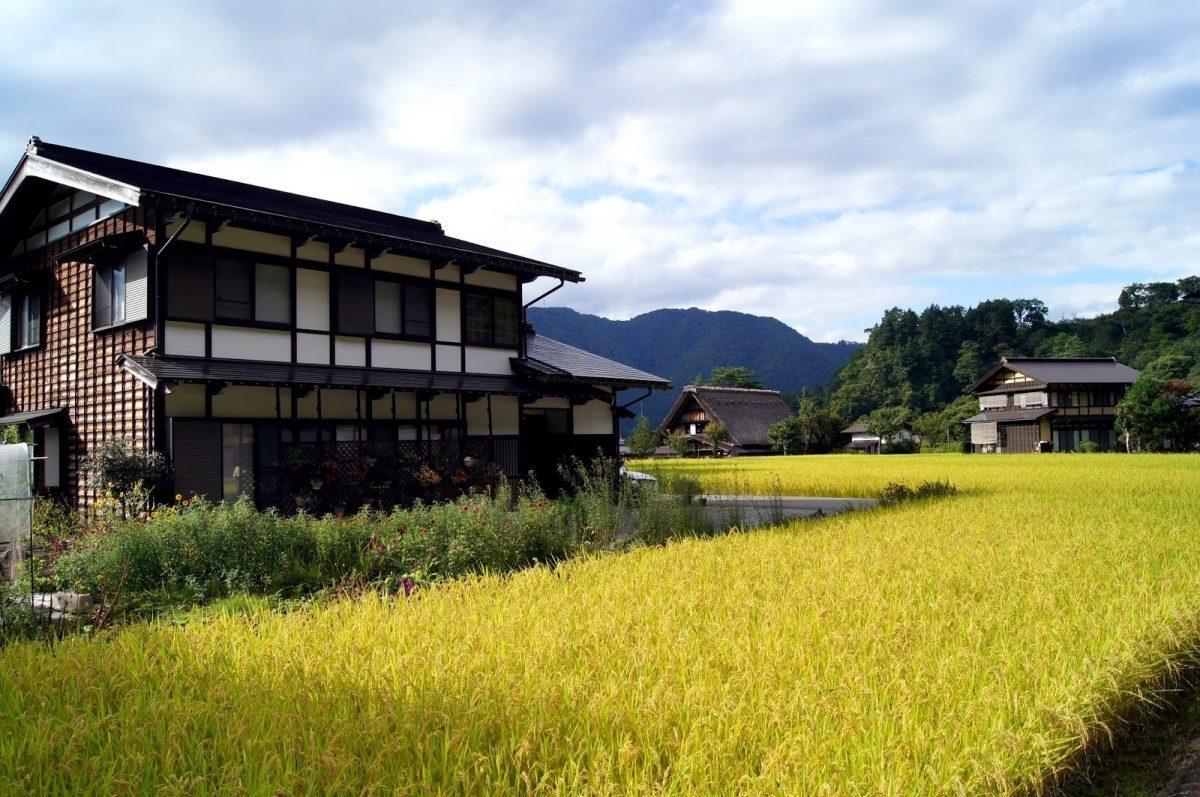
The village’s steep-roofed gassho-zukuri houses are the reason people come. Treat Shirakawago as a timed transport stop rather than an open-ended country walk: choose the bus times first, then build the village route between them. Nohi Bus marks some Takayama–Shirakawago–Kanazawa services as reservation-only and warns that traffic, snow or road closures can cause major delays, so use the official bus page rather than copying an old timetable.
Would I still include it? Yes, if traditional villages and mountain landscapes interest you. No, if adding it means removing nearly all your time in Kyoto.
Read our guides to two days in Takayama and a day trip to Shirakawago.
BUILDING BLOCK 4: KANAZAWA
- Allow
- two nights; three if using it as a relaxed base
- Best for
- gardens, historic districts, samurai and geisha-era streets, seafood and a calmer city
- Connects well to
- Tokyo, Kyoto, Takayama and Shirakawago
- Our experience
- three-night stay on our second trip
Kanazawa was one of the biggest structural differences between our first and second trips. Instead of returning immediately to the classic Tokyo–Kyoto axis, we stayed three nights and gave the city room.
A PRACTICAL TWO-DAY KANAZAWA BLOCK
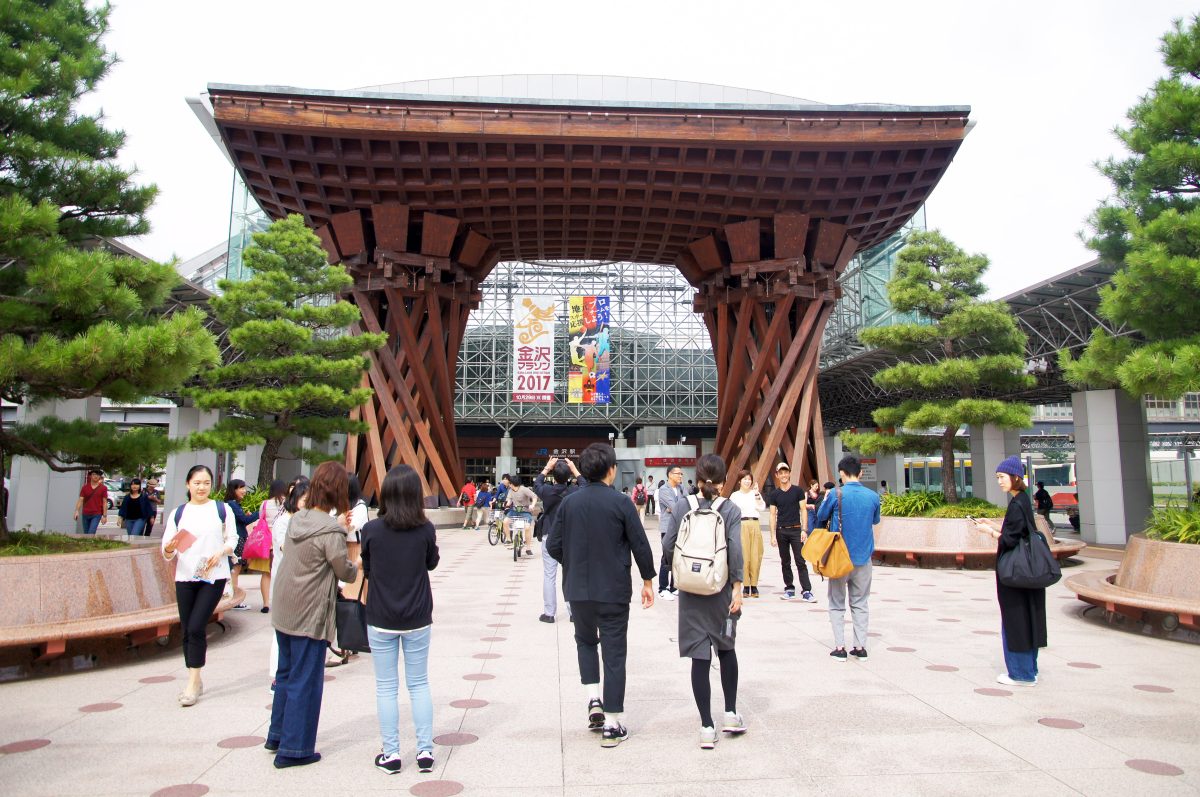
Day 1: Tsuzumi-mon Gate (鼓門) and station area → Omicho Market (近江町市場) → Nagamachi samurai district → evening in the city.
Day 2: Kanazawa Castle (金沢城) → Kenroku-en → tea break → Higashi Chaya district.
Optional Day 3: Shirakawago, or keep the city day slower and use Kanazawa as a restorative base between Tokyo and Kyoto.
A practical two-day block can combine the castle and Kenroku-en area on one day, then the historic districts and market on another. If you’re also visiting Shirakawago or Takayama, Kanazawa can act as the cleanest link between the Alps and Kyoto.
What I wouldn’t do is label it a “hidden gem.” It’s a well-established destination (and, to be honest, I use that phrase very cautiously anyway). Its value isn’t secrecy; it’s the way it provides many of the things people seek in Kyoto at a different scale.
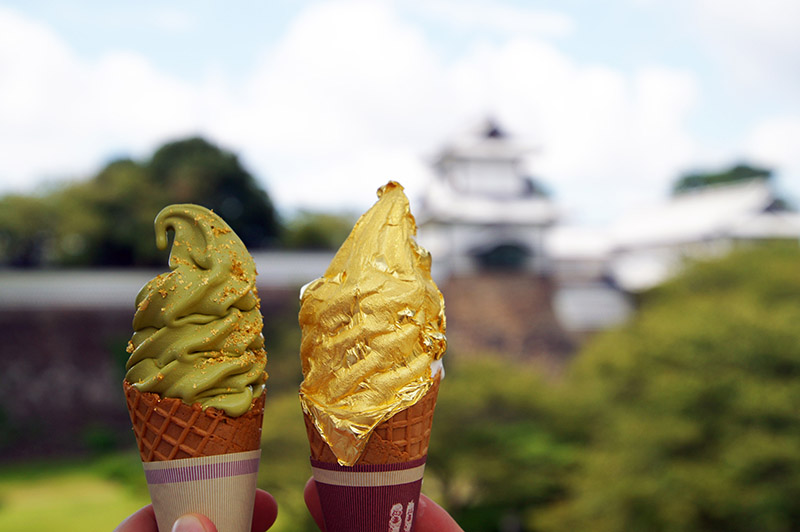
Our trip diary confirms Kanazawa Castle, gold-leaf ice cream, Kenroku-en, a tea ceremony, Nomura Samurai House and Nagamachi, and Higashi Chaya. The sequence above groups those experiences into two practical days rather than claiming it’s the only correct order.
PART III – KANSAI AND WESTERN JAPAN
BUILDING BLOCK 5: KYOTO
- Allow
- three full days; four if this is your first trip
- Best for
- temples, traditional streets, gardens and early starts
- Connects well to
- Osaka, Nara, Hiroshima and the central-Japan blocks
- Our experience
- first trip, with a later return visit
Kyoto is where ambitious itineraries most often fall apart. The attractions look compact on a map, but they spread across different sides of the city. Divide the days geographically.

A THREE-DAY KYOTO BLOCK
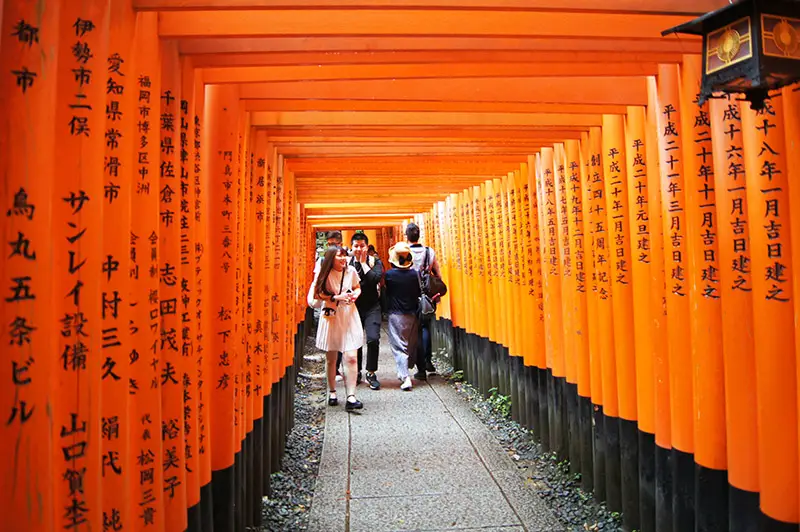
Day 1 – Eastern Kyoto: Kiyomizu-dera → Sannenzaka (産寧坂) and Ninenzaka (二寧坂) → Kodai-ji (高台寺) → Yasaka Shrine (八坂神社) → Gion.
Day 2 – Southern or central Kyoto: Fushimi Inari early → one compact second area → unplanned evening.
Day 3 – Western Kyoto: Arashiyama bamboo grove → Okochi Sanso (大河内山荘) → monkey park or one temple.
Fourth day: Nara, northern Kyoto or the flexible half-day the itinerary will probably need.
KAT’S TIP – WEAR SHOES YOU CAN REMOVE EASILY
Temple and traditional-interior days can involve taking your shoes off more than once. Wear a pair that’s easy to remove and put back on, and carry socks you’re happy to be seen in. It sounds trivial until you’re undoing awkward footwear again with a queue behind you.
Kyoto day A: Higashiyama and Gion
Our eastern Kyoto day linked Sanjusangen-do (三十三間堂), Kiyomizu-dera, the preserved streets of Higashiyama, Kodai-ji, Yasaka Shrine and Gion.
This is a full day. It works because the later stops can be joined on foot. Slow down on Sannenzaka and Ninenzaka instead of treating them as a corridor between pins.
We ended with a Kyoto-style kaiseki meal served by a woman in kimono. This wasn’t a geisha experience: a kimono isn’t evidence that somebody is a geiko or maiko, so I describe exactly what happened rather than upgrading the story.
Kyoto day B: Fushimi Inari and southern Kyoto
Fushimi Inari can be a quick photograph at the first torii gates or a longer walk into the wooded mountain. We preferred continuing beyond the most crowded opening stretch.
Go early if you want quieter paths. But don’t feel obliged to reach the summit simply because it exists. The experience changes as you climb, but your itinerary doesn’t award medals.
Kyoto day C: Arashiyama
We combined the bamboo grove with Okochi Sanso and the monkey park. Okochi Sanso was one of the places that made the area feel more substantial than a famous bamboo photograph, while the climb to the monkeys produced wide views back across Kyoto.
Arashiyama becomes much busier as the day develops. Start early and choose two or three priorities rather than every temple in the district.
Optional Kyoto day D: a slower northern or central day
Use a fourth day for the side of Kyoto that the first three don’t cover: a smaller temple, a garden, a museum or simply an afternoon without a military timetable.
The route I’d give a friend protects one flexible half-day. Kyoto rewards curiosity more than completionism.
Read our complete three-day Kyoto itinerary.
BUILDING BLOCK 6: NARA
- Allow
- one day from Kyoto or Osaka
- Best for
- major Buddhist sites, parkland and an easy cultural day trip
- Our experience
- first trip
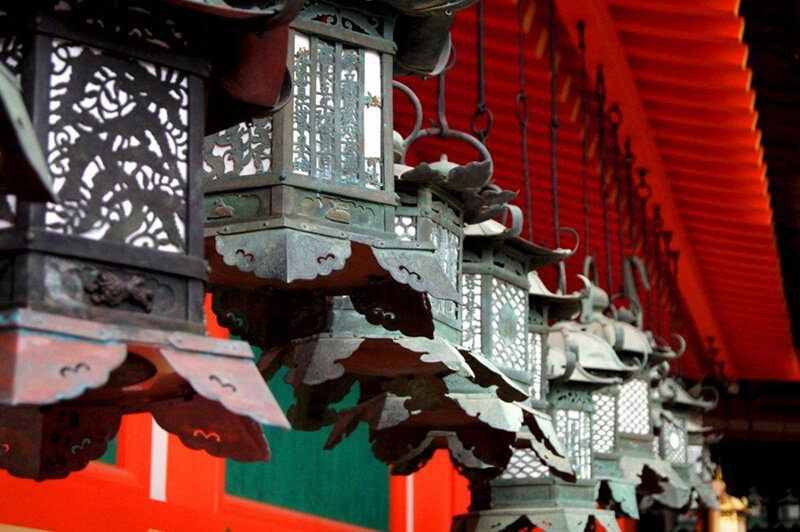
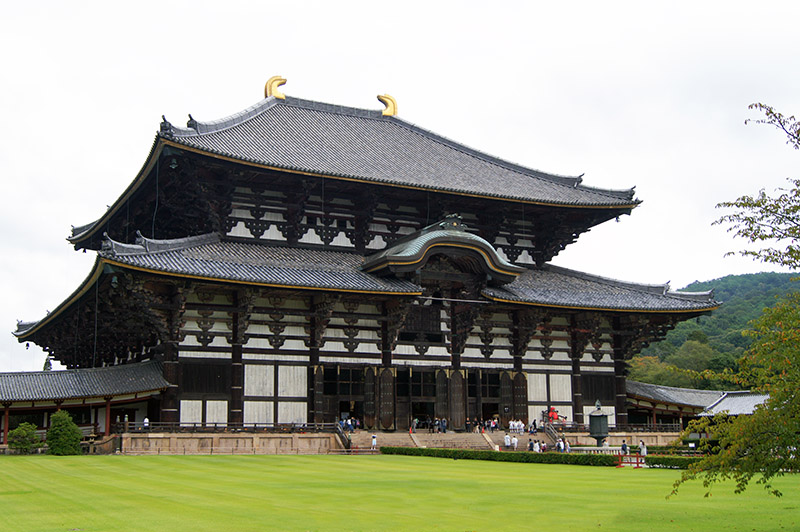
Our route took us from Kofuku-ji (興福寺) through Nara Park (奈良公園) to Todai-ji (東大寺) and Kasuga Taisha (春日大社). That’s already a substantial day.
NARA AS A TRANSFER-DAY BLOCK
Leave Kyoto after breakfast → store luggage at or near the station → Kofuku-ji → Nara Park → Todai-ji → Kasuga Taisha if time and energy allow → collect bags → continue to Osaka.
This reuses a hotel-change day instead of creating another return trip. If you dislike travelling with luggage, visit from whichever Kansai base you keep longest.
The deer are part of Nara’s identity, but they are wild animals rather than theme-park employees (they haven’t read your itinerary). Keep food and loose paper secure, follow current local guidance and don’t assume every deer wants to pose politely.
Horyu-ji (法隆寺) is a possible addition, but I’m not currently confident that we personally visited it on that day. It remains a researched option rather than a first-hand recommendation.
Kyoto or Osaka as a base? Both work. Choose the city that reduces your hotel changes.
Read our Kyoto-to-Nara day-trip guide.
BUILDING BLOCK 7: OSAKA AND HIMEJI
- Allow
- two nights for Osaka; add one day for Himeji
- Best for
- food, nightlife, a lively contrast to Kyoto and an efficient western base
- Connects well to
- Kyoto, Nara, Himeji and Hiroshima
- Our experience
- three-night Osaka stay and Himeji visit on our second trip
Osaka works best when you let it be Osaka rather than using it only as a cheaper bedroom for Kyoto (preferably after dark and while hungry). Give the city an evening for food and at least one proper day.
A TWO-NIGHT OSAKA BLOCK
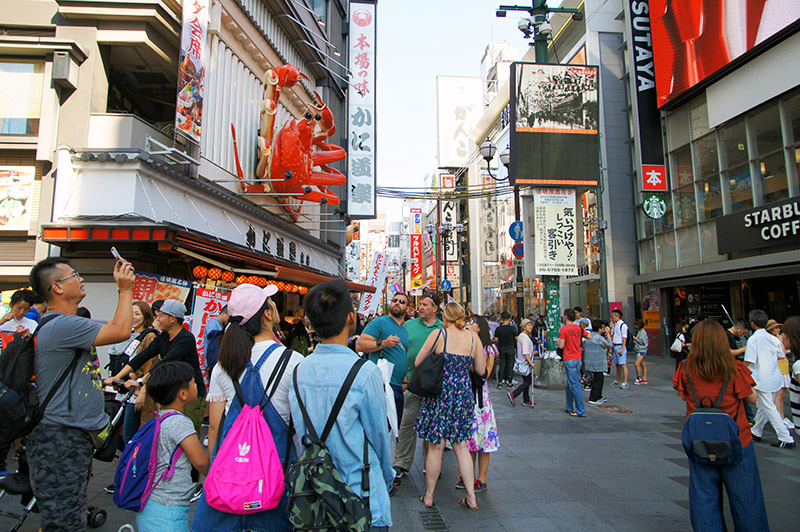
Arrival evening: Namba (難波) and Dotonbori; eat rather than trying to complete a sightseeing list.
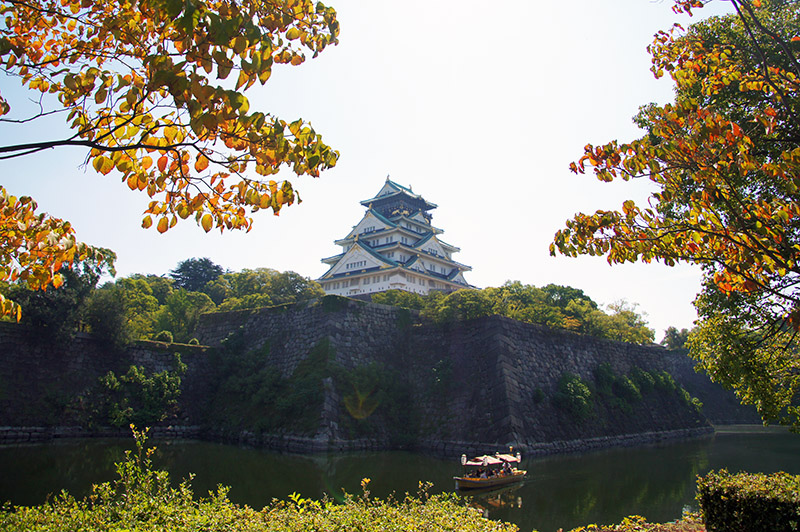
Full day: Osaka Castle and park → choose Kuromon Market, Nipponbashi (日本橋) or Shinsekai (新世界) → return to Namba after dark.
Going west: Stop at Himeji on the transfer to Hiroshima and store your luggage at the station.
Our three-night stay at Hotel Cordia Osaka allowed us to keep one base while visiting the region. We explored Grand Front, the aquarium, Osaka Castle, Shinsaibashi, Dotonbori, Kuromon Market and Den Den Town. Our two-day Osaka itinerary puts that route, current prices and the places we would add now in one guide.
On 27 September we visited Himeji Castle and Koko-en and stopped at a Hello Kitty café. Himeji fits naturally on the railway towards Hiroshima, so it can be a day trip or a stop while travelling west.
So the practical rule is simple: if you’re continuing to Hiroshima, put Himeji on the transfer day and store your luggage. If you’re returning to Tokyo or flying from Osaka, use it as a day trip.
BUILDING BLOCK 8: HIROSHIMA AND MIYAJIMA
- Allow
- two nights minimum
- Best for
- modern history, reflection, an island day and a western endpoint
- Connects well to
- Himeji and Osaka/Kyoto
- Our experience
- first trip
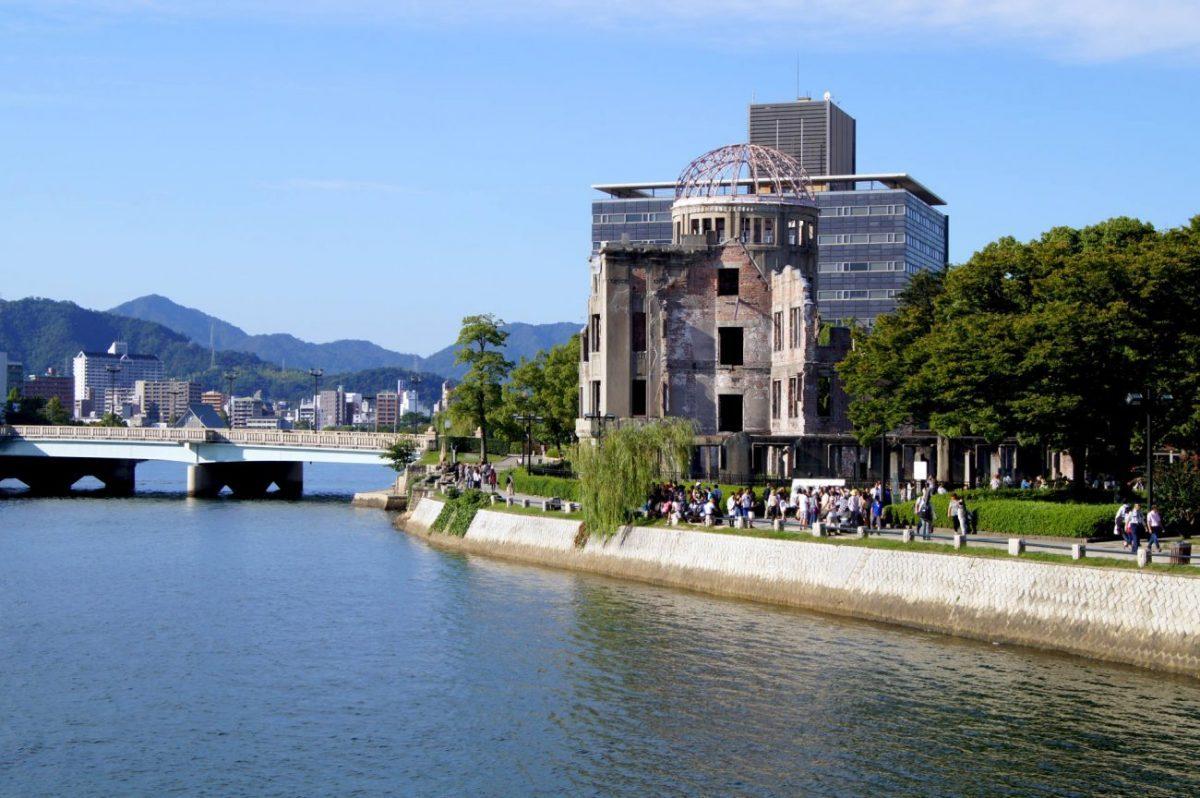
We arrived in Hiroshima after travelling from Takayama via Nagoya and Shin-Osaka (新大阪), then used the following day for the Peace Memorial area.
A THREE-DAY WESTERN JAPAN BLOCK
Day 1: Stop at Himeji while travelling from Osaka to Hiroshima; check in and have Hiroshima-style okonomiyaki.
Day 2: Peace Memorial Park → Atomic Bomb Dome (原爆ドーム) → Hiroshima Peace Memorial Museum (広島平和記念資料館) → leave the later afternoon deliberately light.
Day 3: Miyajima waterfront and shrine area → Daisho-in (大聖院) → Mount Misen (弥山) only if weather, daylight and energy make sense.
KAT’S TIP – DO NOT RUSH THE PEACE MEMORIAL SITES
Don’t put a non-refundable long-distance departure or a high-energy evening immediately after the museum. Give yourself somewhere quiet to go – or permission to do nothing (which is a perfectly valid plan after that museum) – rather than forcing the day back onto a sightseeing schedule.
Hiroshima city day
Walk through the Peace Memorial Park, visit the museum and allow the experience to dictate the pace. Add other city sights only around that centre of gravity.
The new article must avoid turning tragedy into dramatic travel prose. Use accurate historical language, current official sources and our personal reaction without exaggeration.
Miyajima day
We took the ferry to Miyajima, explored the shrine area and climbed Mount Misen. We then spent too long on the mountain (our relationship with closing times wasn’t healthy) and ended up hurrying down a steep trail before dark.
Miyajima can be an easy waterfront day or a hiking day. Trying to make it both without checking the final descent and ferry timing is how the island stops feeling serene.
Finish with Hiroshima-style okonomiyaki back in the city – or stay on the island if you want to experience it after day-trippers leave.
Read our guides to two days in Hiroshima and a day trip from Hiroshima to Miyajima.
PART IV – OKINAWA
BUILDING BLOCK 9: OKINAWA MAIN ISLAND
- Allow
- four nights in Naha for the route we followed
- Best for
- honeymooners, repeat visitors, Ryukyu history, food, beaches and road trips
- Connects well to
- Ishigaki by air; Tokyo or Osaka by domestic flight
- Our experience
- honeymoon, May 2019
Okinawa isn’t a quick detour from the Golden Route. It’s a different trip. If you include it in two weeks, remove a mainland region and let the islands breathe.
We stayed at The Naha Terrace for four nights and used Naha as the base for one city day, one Zamami day trip and one full main-island road trip.
Naha day
Our full city day combined the Okinawa Prefectural Museum & Art Museum (沖縄県立博物館・美術館), Okinawan soba, Shuri Castle (首里城), the pottery streets of Tsuboya (壺屋) and dinner at First Makishi Public Market (第一牧志公設市場). We used our arrival evening for Kokusai-dori (国際通り) and our final morning for Fukushu-en Garden (福州園).
Shuri Castle was severely damaged by fire in October 2019, so our photographs show the pre-fire complex. Reconstruction began after our visit and was still underway in 2024, with completion of the main hall then planned for 2026. Accessible areas have changed during the work, so check the official Shurijo Castle Park site rather than assuming our route through the complex still applies.
The First Makishi Public Market building has also changed since our honeymoon. The old building we visited closed shortly afterwards and the rebuilt market opened in March 2023. The market still belongs in a Naha day, but our 2019 photographs and layout describe the former building.
Zamami day trip
We travelled independently by ferry, walked through the village and continued to Ama Beach (阿真ビーチ). Restaurants and taxis weren’t waiting in abundance, so we eventually bought food from a tiny shop (by then, lunch was whatever we could find) and watched the clock more than expected.
At Ama Beach we snorkelled with the full-face masks Gary preferred because he hates salt water on his lips. We saw a titan triggerfish and several other fish but no turtle. I also annoyed a territorial fish near its nest and received a small nip. In fairness, I was probably the intruder.
We spent so long in the water that Furuzamami Beach (古座間味ビーチ) fell out of the plan. If your ferry gives you only a short window, choose one beach.
Main-island road trip
Our full route was:
Naha → Okinawa Churaumi Aquarium (沖縄美ら海水族館) → Pizza in the Sky → Cape Manzamo (万座毛) → Ryukyu Mura (琉球村) → Zakimi Castle Ruins (座喜味城跡) → Mihama American Village (美浜アメリカンビレッジ) → Naha.
Gary collected the rental car while I queued for spam onigiri. Finding one another afterwards was more difficult than the division of labour had suggested (it had sounded much more efficient when we split up).
The aquarium’s whale sharks were extraordinary, although seeing such huge animals in captivity also left me unsure how I felt about the experience. Pizza in the Sky justified a road that made us wonder whether lunch could possibly exist at the end of it. We then reached Ryukyu Mura too late for many of its scheduled demonstrations, visited the curved stone walls of Zakimi Castle and ended among the lights and taco rice of American Village.
The route is possible because we did it. It isn’t relaxed. I’d now leave earlier or remove one afternoon stop.
For the practical choices around bases and meals, start with where to stay in Okinawa and our favourite Okinawan food. Then continue planning with our five-day Okinawa itinerary, Naha itinerary without a car, Zamami day trip, Okinawa Main Island road trip, Churaumi Aquarium day trip, Ryukyu Mura review and The Naha Terrace review.
BUILDING BLOCK 10: ISHIGAKI, TAKETOMI AND IRIOMOTE
- Allow
- three nights minimum; four is better
- Best for
- island-hopping, beaches, mangroves and a honeymoon or nature-led route
- Connects well to
- Okinawa Main Island by air
- Our experience
- honeymoon, May 2019
We flew from Naha to Ishigaki and stayed three nights at Grandvrio Resort Ishigakijima. On arrival we were exhausted enough to eat at the hotel, book a massage and accept that not every honeymoon evening needs an expedition.
Taketomi day
We travelled by ferry, joined a water-buffalo cart ride and used bicycles to explore. The ox knew the route so well that it stopped at intersections without needing directions (it clearly knew the island better than we did). The coral-stone walls, sandy lanes, traditional red-roofed houses, beach, pier, Okinawan graveyard and shaved ice made Taketomi visually unlike the mainland cities earlier in our travels.
Walking alone would have limited what we could see in the time available. The bicycles gave us independence without turning the small island into a race.
Iriomote day
Our guided day combined roughly thirty minutes of kayaking each way with a humid, steep and muddy hike to Pinaisara Falls. We began the day already dealing with bad sunburn and heat exhaustion, and neither of us had realised how physically challenging the trek would be. At points it felt too precarious to stop for photographs, so the GoPro did most of the documenting. It was one of the most adventurous and memorable experiences of the honeymoon, but not an easy excursion.
This is the sort of day where the operator, weather, footwear and ferry connection matter. Book it as a joined-up excursion rather than assembling a risky chain of independent transfers from a search snippet.
What I’d change: add a fourth night if possible. Three nights gave us two excellent island days, but little room for weather disruption or Ishigaki itself.
Continue with our three-night Ishigaki itinerary, Taketomi day trip, Iriomote and Pinaisara Falls guide and Grandvrio Resort review.
FIVE READY-MADE JAPAN ITINERARIES
The modules above are the useful part. But if you’d rather choose a route and book it, these finished combinations do the work for you. The first four are designed around a two-week trip. The fifth is a deliberately broad, FOMO-friendly route, with the sixteen calendar days it actually needs.
Route 1: the best first-time Japan itinerary
- Best for
- a first visit with major cities, one Fuji-area day and western Japan
- Pace
- busy but realistic
- Bases
- Tokyo, Kyoto, Osaka, Hiroshima
| Day | Sleep | Plan |
|---|---|---|
| 1 | Tokyo | Arrive; take a gentle Hanzomon/Imperial Palace or neighbourhood walk if energy allows |
| 2 | Tokyo | Shibuya, Harajuku, Meiji Shrine and Shinjuku |
| 3 | Tokyo | Ueno, Asakusa and the water bus/Odaiba |
| 4 | Tokyo | Skytree, Sumida and Ryogoku, or Tsukiji and Akihabara |
| 5 | Tokyo | Choose Hakone, Kawaguchiko or Kamakura – one, not all three |
| 6 | Kyoto | Travel to Kyoto; evening in Gion |
| 7 | Kyoto | Higashiyama route from Kiyomizu-dera to Yasaka and Gion |
| 8 | Kyoto | Fushimi Inari plus a slower southern/central Kyoto afternoon |
| 9 | Kyoto | Arashiyama, Okochi Sanso and optional monkey park |
| 10 | Osaka | Nara on the way or as a day trip; continue to Osaka |
| 11 | Osaka | Osaka city and a proper food-focused evening |
| 12 | Hiroshima | Himeji stop while travelling west; continue to Hiroshima |
| 13 | Hiroshima | Peace Memorial Park and museum; unhurried city afternoon |
| 14 | Hiroshima or Osaka | Miyajima; continue towards your departure airport only if the timing is sensible |
Why this route wins: it covers the places most first-time visitors genuinely ask about without adding the Alps as a fifth competing region.
What to cut if you dislike moving: remove Hiroshima, stay longer in Kyoto/Osaka and use Himeji as a day trip.
Route 2: Tokyo, the Alps and Kyoto
- Best for
- historic towns, mountain scenery and fewer megacity days
- Pace
- moderate, with some long transfers
- Bases
- Tokyo, Kanazawa, Takayama, Kyoto, Osaka or Tokyo for departure
| Day | Sleep | Plan |
|---|---|---|
| 1 | Tokyo | Arrive and recover |
| 2 | Tokyo | Imperial Palace, Marunouchi, Ginza and Yurakucho |
| 3 | Tokyo | Shibuya, Meiji Shrine and Shinjuku |
| 4 | Tokyo | Asakusa, Ueno and east Tokyo |
| 5 | Tokyo | Nikko or Kawaguchiko day trip |
| 6 | Kanazawa | Travel to Kanazawa; market or historic district |
| 7 | Kanazawa | Castle, garden and city day |
| 8 | Takayama | Travel via Shirakawago if current bus logistics work for your luggage |
| 9 | Takayama | Markets, old town and Hida food |
| 10 | Kyoto | Travel to Kyoto |
| 11 | Kyoto | Higashiyama and Gion |
| 12 | Kyoto | Fushimi Inari and another Kyoto district |
| 13 | Kyoto | Arashiyama or Nara day trip |
| 14 | Osaka or Tokyo | Continue to the airport city; add a separate departure morning if possible |
Why this route works: the mountain block replaces Hiroshima rather than competing with it.
What to watch: Shirakawago transport and luggage planning. Don’t improvise the last bus during a national holiday as we did.
Route 3: our 2017 return-visitor route
- Best for
- people who have already seen central Tokyo and Kyoto
- Pace
- varied; day trips at the start
- Bases
- Tokyo, Kanazawa, Osaka, Tokyo, with transfer-day stops in Matsumoto and Kyoto
| Day | Sleep | Plan |
|---|---|---|
| 1 | Tokyo | Arrive |
| 2 | Tokyo | Nikko: Shinkyo Bridge, Toshogu Shrine and Futarasan Shrine |
| 3 | Tokyo | Lake Kawaguchiko: ropeway, boat, soba and lakeside walk |
| 4 | Tokyo | Shibamata: Tora-san Museum, temple, old street and teahouse |
| 5 | Tokyo | Roppongi Hills and Odaiba, including the science museum |
| 6 | Kanazawa | Visit Matsumoto Castle while travelling to Kanazawa |
| 7 | Kanazawa | Castle, Kenroku-en, tea ceremony, Nagamachi and Higashi Chaya |
| 8 | Kanazawa | Jigokudani Monkey Park day trip (no snow for us, but plenty of monkeys) |
| 9 | Osaka | Travel to Osaka; Grand Front and the aquarium |
| 10 | Osaka | Osaka Castle, Kuromon, Den Den Town, Shinsaibashi and Dotonbori |
| 11 | Osaka | Himeji Castle, Koko-en and the Hello Kitty café |
| 12 | Tokyo | Stop at Kinkaku-ji in Kyoto while travelling back to Tokyo |
| 13 | Tokyo | Final Tokyo day or departure, depending on your flights |
| 14 | Tokyo | Departure or a spare final day if your calendar allows it |
Why this route works: it follows the shape and stops of our 2017 trip, including Matsumoto, Jigokudani and the Kinkaku-ji stop that can otherwise disappear when you summarise it too neatly. The table turns that experience into a reader-friendly fortnight rather than pretending every flight will match ours.
Disclosure: several Tokyo hotel stays on that trip were arranged as media collaborations. Any hotel links should retain the relevant review disclosures.
Route 4: Tokyo and Okinawa honeymoon itinerary
- Best for
- couples, repeat visitors, beaches, culture and nature
- Pace
- active but with fewer long railway days
- Bases
- Tokyo, Naha, Ishigaki
- Important
- domestic flights replace the cross-country rail route
| Day | Sleep | Plan |
|---|---|---|
| 1 | Tokyo | Arrive |
| 2 | Tokyo | Shibuya, Meiji Shrine and Shinjuku |
| 3 | Tokyo | Asakusa, Ueno and east Tokyo |
| 4 | Naha | Fly to Naha; Kokusai-dori evening |
| 5 | Naha | Museum, Shuri, Tsuboya and Makishi |
| 6 | Naha | Zamami day trip – or keep this as a slower Naha day |
| 7 | Naha | Main-island road trip |
| 8 | Ishigaki | Fly to Ishigaki; resort or town evening |
| 9 | Ishigaki | Taketomi day trip |
| 10 | Ishigaki | Iriomote kayaking and Pinaisara Falls |
| 11 | Tokyo | Fly to Tokyo |
| 12 | Tokyo | Imperial Palace, Ginza and Yurakucho |
| 13 | Tokyo | Skytree/Sumida/Ryogoku or a free choice |
| 14 | Tokyo | Departure or final neighbourhood |
What I’d change from our honeymoon: I’d add a fourth Ishigaki night and remove Zamami if fourteen days were strict. Zamami was worthwhile, but Taketomi, Iriomote and the main-island road trip left stronger impressions.
Route 5: the FOMO mainland itinerary
- Best for
- travellers who knowingly prefer variety and momentum to slow mornings
- Pace
- very fast
- Length
- 16 calendar days, including arrival and departure
- Bases
- Tokyo, Nagano, Kanazawa, Takayama, Kyoto, Osaka and Hiroshima
- Important
- this ambitious route combines places from our trips into a new plan; it isn’t a single route we travelled end to end.
| Day | Sleep | Plan |
|---|---|---|
| 1 | Tokyo | Arrive and keep the evening local |
| 2 | Tokyo | Choose one compact Tokyo district route |
| 3 | Tokyo | Hakone loop day trip |
| 4 | Nagano | Travel from Tokyo to Matsumoto; visit the castle, then continue to Nagano |
| 5 | Kanazawa | Jigokudani Monkey Park, then continue from Nagano to Kanazawa only if the day’s connections work |
| 6 | Kanazawa | Castle, Kenroku-en and one historic district |
| 7 | Takayama | Travel from Kanazawa via Shirakawago; continue to Takayama |
| 8 | Kyoto | Takayama morning, then travel to Kyoto; keep the evening unplanned |
| 9 | Kyoto | Higashiyama and Gion |
| 10 | Kyoto | Fushimi Inari and another compact Kyoto area |
| 11 | Osaka | Nara on the transfer from Kyoto to Osaka |
| 12 | Osaka | Osaka city and a food-focused evening |
| 13 | Hiroshima | Himeji stop on the way to Hiroshima |
| 14 | Hiroshima | Peace Memorial Park, museum and an unhurried afternoon |
| 15 | Hiroshima | Miyajima day trip |
| 16 | Departure city | Use an open-jaw flight if possible; otherwise allow a separate return leg to Tokyo |
So this is the broadest mainland route I can describe responsibly without pretending that fourteen days contain more hours than they do. It still leaves out Okinawa, Kawaguchiko, Kamakura and Nikko. Adding those would require choices, not smaller type (sadly).
If you only have fourteen calendar days, cut one complete region: either remove Nagano and Matsumoto, or remove Hiroshima and Miyajima. Don’t solve the problem by turning every remaining day into a transfer.
To add the Okinawa honeymoon block as well, turn this into a three-to-four-week trip and fly south from Tokyo or Osaka. Okinawa isn’t the seventeenth stop on a sensible two-week rail itinerary.
KAT’S TIP – FORWARD THE BIG BAG BEFORE THE MOUNTAIN SECTION
For this route, send the main suitcase ahead to Kanazawa or Kyoto and carry a small overnight bag through Nagano and Matsumoto. It won’t make the pace slow, but it removes the least enjoyable part of frequent transfers: manoeuvring a large case through stations for one-night stops.
HOW TO BOOK THIS TRIP WITHOUT OVERPLANNING IT
Book the route in this order
- International flights and arrival/departure airports.
- Your overnight bases and number of nights.
- Limited or high-demand experiences that matter to you.
- Long-distance trains, buses or domestic flights where advance booking is useful.
- Day-trip detail.
- Restaurants only when the meal itself is a priority.
And if you reverse that process, you can end up preserving a lunch reservation while rebuilding an entire cross-country route around it.
Luggage: the unglamorous part that changes everything
Station lockers were our usual solution after checking out or on transfer days. We only used luggage forwarding once, during our 2017 trip, so I won’t pretend it was our standard method across all three trips.
Forwarding can remove a great deal of friction on a route with several bases, but it isn’t instantaneous. Keep a small overnight bag and confirm delivery timing with your hotel.
For Himeji or another transfer-day stop, use station storage only after checking locker size and availability. A theoretical locker isn’t useful when every large compartment is occupied (usually because everyone else had the same idea).
There’s also a Shinkansen rule that didn’t apply in this form on our first trip. On the Tokaido, Sanyo and Kyushu Shinkansen, luggage with combined dimensions over 160 cm and up to 250 cm requires a reserved seat with an oversized-baggage area; items over 250 cm can’t be taken aboard. Check the official JR Central luggage guidance before travelling with a large case.
Trains, buses and passes
Japan’s rail network makes these routes possible, but not every train belongs to the same operator and not every pass covers every leg.
- Compare the current nationwide rail-pass price with individual tickets.
- Check regional passes only after fixing the route.
- Reserve rural buses when required or advisable, especially around Shirakawago.
- Leave transfer time when changing with luggage.
- Save the Japanese name and address of your hotel offline.
Our 2015 seven-day pass was excellent value for our particular long-distance week. It’s historical evidence, not a universal recommendation.
Internet access
We used pocket Wi-Fi on our earlier trips, and it rescued our Okinawa road trip when the car’s navigation stopped cooperating. An eSIM or local SIM may suit you better now. The product is less important than having reliable data, a battery plan and offline copies of essential bookings (especially when the satnav has other ideas).
Small decisions to make while planning your Japan itinerary
I’m not trying to turn this into a complete Japan travel-tips guide (that’s a different post entirely). These are the smaller details that actually changed how we planned a day, timed a transfer or decided where to eat. For fuller planning advice, see How to Plan a Trip to Japan: A First-Time Visitor’s Guide.
Don’t assume one pass or card will cover every leg. In Tokyo, we used what we believe was a Suica card; PASMO was the other common option, and we used the regional equivalent elsewhere. At the time, different train lines were run by different operators, so we still had to work out which local, long-distance and reserved journeys needed separate tickets (not exactly the exciting part of itinerary planning, but better than discovering it at the gate).
Check your navigation before committing to a complicated day. Citymapper was the only navigation app we actually used, and it helped us make sense of the subway and rail network. Other Japan-specific transport and translation apps are available now, but we didn’t compare them (and I’m not going to pretend we did); the useful planning question is whether your chosen app covers every city and transfer on your route.
Decide how you’ll manage cash before you fly. Japan was noticeably cash-heavy during our trips, so we withdrew cash at home, kept most of it in the hotel safe and carried only that day’s amount in a hidden money pouch (something we do everywhere, not just Japan). We still withdrew more from 7-Eleven ATMs two or three times; I can’t remember the amount and our budget post doesn’t record it, so I’m not going to invent one.
Let the walking decide your shoes. We already took our shoes off at home, so doing the same in Japan wasn’t an adjustment for us (apparently we were accidentally prepared for that one). Slip-ons may make repeated shoe changes easier, but I wouldn’t choose them purely for that reason if a route involves full days on foot – support and comfort matter more.
Leave a little room in the restaurant budget. Tipping isn’t customary and can cause confusion, but at some restaurants we were given a small dish we hadn’t ordered and it later appeared on the bill. We thought this might be a substitute for a tip; having checked it properly, it’s better described as otoshi – a small appetiser connected to a table or cover charge.
Carry a small rubbish bag on long sightseeing days. Public bins were scarce, so we often carried our rubbish until we found a bin at a 7-Eleven or returned to the hotel (which is worth remembering before filling a day with street food).
Choose lockers or forwarding before a transfer day. Station lockers were our usual solution, while we used luggage forwarding only once, on our 2017 trip. So I’d make that choice around the actual route and delivery timing rather than assuming forwarding is essential for every Japan itinerary.
Decide whether a public onsen suits everyone before adding it to the route. Ours was naked-only and gender-separated, so Gary and I experienced it alone rather than together; photography wasn’t allowed and, because our bodies looked visibly different from the other bathers, we did experience some staring (not necessarily the relaxing couple’s activity you might be picturing). Lockers were provided and we hired towels and slippers; we washed on low stools with handheld showers and a bucket before entering the bath, and visible tattoos weren’t allowed at the time, so check the specific onsen’s current policy or look for a private bath if any of that affects your decision.
Use konbini meals where the route matters more than a sit-down lunch. We relied on konbini breakfasts and lunches to keep costs down, especially on our first trip when our budget was tighter. The sushi surprised me (I’ve been disappointed by UK supermarket sushi ever since), and I loved the hot filled buns and pastries – plus trying as many different drinks as possible from the fridges and vending machines.
Plan train meals before you board. On our first train ride, we were excitedly discussing the trip at full volume, noticed the disapproving looks and quickly worked out that trains are a hushed-voice affair (subtle, we weren’t). We also learned that eating wasn’t generally done on ordinary trains, the metro or while walking, while it seemed acceptable on the Shinkansen; on our trips, station kiosks and onboard trolley services sold bento-style meal boxes, but check the current service and buy before boarding if necessary.
WHAT WE WOULD DO DIFFERENTLY AFTER THREE TRIPS
We’d change hotels less often in Tokyo
Our second trip included several excellent Tokyo hotels, but moving between them made sense for review work more than it would for an ordinary holiday. Choose one well-connected base unless the hotel itself is part of the experience.
We’d stop treating closing time as a personal challenge
We reached Kamakura’s Great Buddha with five minutes to spare. We reached Ryukyu Mura after many performances had finished. We rushed down Mount Misen as the light disappeared.
The pattern is fairly clear (we are, apparently, slow learners). Put attractions with fixed closing times first and flexible streets, food areas and viewpoints later.
We’d allow weather to choose the Fuji day
Cloud hid Fuji from us in Shinjuku and Hakone, while Kawaguchiko became one of the most important days of our lives. But if the mountain matters to you, stay overnight or keep the day flexible.
We wouldn’t combine every trip into one itinerary
And this is the central lesson of the whole post: Japan rewards return visits. You don’t fail your first trip by leaving Kanazawa, Okinawa or Hiroshima for next time.
We’d keep the mishaps in the story
The lost luggage, wrong turn, shouting satnav, missing archaeology gallery and territorial fish aren’t embarrassing details to delete (even when I’d rather not relive some of them). They are the information that helps another traveller plan realistically – and, years later, they are often the parts we remember best.
FREQUENTLY ASKED QUESTIONS ABOUT A TWO-WEEK JAPAN ITINERARY
Are two weeks enough for Japan?
So yes, two weeks are enough for an excellent first trip, but not enough for the whole country (those are very different promises). Choose three or four bases and one main regional detour. You’ll enjoy Tokyo, Kyoto and a carefully chosen extra block more than six places seen through train windows.
What is the best 14-day Japan itinerary for a first-time visitor?
If this is your first visit, I’d recommend Tokyo for five nights including one Fuji-area day at Hakone or Kawaguchiko, Kyoto for four nights including a Nara day trip, Osaka for two nights and Hiroshima for two nights including Miyajima. If you sleep in the Fuji area, use four Tokyo nights plus that one overnight instead. Adjust the final night around your departure airport.
How many nights should I spend in Tokyo?
Allow at least three full days, or four to five nights when arrival time and a day trip are included. Tokyo is easier when each day is grouped by neighbouring districts.
How many nights should I spend in Kyoto?
Three full days cover a strong first visit; four give you space for a slower district, garden or day trip. Kyoto becomes frustrating when distant attractions are scattered randomly through the same day.
Do I need to stay in both Kyoto and Osaka?
No. They are close enough that you can base yourself in one and visit the other. Stay in both if you want Kyoto’s quieter early mornings and Osaka’s late-night food atmosphere without commuting at either end of the day.
Hakone or Lake Kawaguchiko: which should I choose?
Choose Hakone for the scenic loop, varied transport, lake, shrine and onsen. Choose Kawaguchiko when Mount Fuji views are the main goal and you can stay overnight for more than one chance to see it. Neither can guarantee clear weather.
Is Hiroshima worth adding to a two-week itinerary?
Yes, if the Peace Memorial sites and Miyajima matter to you. Allow two nights so the city isn’t reduced to a rushed museum stop. If you prefer mountains and historic towns, use those nights for Kanazawa and Takayama instead.
Should I buy a Japan Rail Pass for two weeks?
Not automatically. Our pass saved money in 2015 because we concentrated several long-distance rail legs into one week, but the nationwide pass was substantially repriced in October 2023. Price your exact trains against the current pass and regional alternatives before buying.
Can I include Okinawa in a two-week Japan itinerary?
Yes, but treat it as a replacement for a mainland region. A good two-week combination is Tokyo plus four nights in Naha and four nights around Ishigaki. Don’t add Okinawa to Tokyo, Kyoto, Osaka, Hiroshima and the Japanese Alps unless your aim is to become intimately familiar with Japanese transport terminals.
Do I need a car in Japan?
Not for the classic Tokyo–Kyoto–Osaka–Hiroshima route. We used trains and buses for our mainland trips. A hire car was valuable for our multi-stop Okinawa Main Island road trip, while Naha itself worked without one.
Is Japan difficult to travel independently?
We found independent travel much easier than expected, even on our first trip. The difficult part wasn’t using the transport; it was deciding how much to fit in. Save your bookings offline, allow transfer time and ask for help when you need it.
What is the biggest Japan itinerary mistake?
For us, it was changing base too often. The second was planning by attraction rather than geography. Both mistakes create a trip that looks efficient in a spreadsheet and feels exhausting on the ground.
FINAL THOUGHTS
After three trips, the clearest lesson is that Japan doesn’t need to be completed in one holiday. Each visit can have a different priority: a first-timer circuit, a return trip built around places you missed, or an island honeymoon that barely resembles the usual rail route.
And that’s really the point of this modular itinerary: it keeps the useful detail without pretending there’s one correct route. Start with Tokyo and Kyoto if it’s your first visit. Add the part of Japan you’re most excited about – not the part an online checklist tells you is compulsory. Leave something for next time (Japan makes that surprisingly easy).
We did, and Japan kept giving us reasons to return. You can browse the rest of our first-hand articles in the Japan travel guide.

What a itinerary!! you visited so many different cities that i can’t wait to go to Japan once more…hope restrictions will go away soon…
Matsumoto will be the first city i’m going to visit :)
Wow! This is the PERFECT itinerary for a short Japan trip.
What an incredibly comprehensive list. This just needs to be bookmarked. I literally want to do everything here! :D
Your post is great!! Very useful and informative!! Japan is a dream for our family and we’d love to go (hope really soon!!!) but actually the budget (for 2 adults and 2 kids) scary us a lot!!!
Thanks for sharing all these brilliant tips!!